






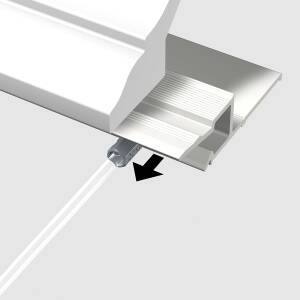
ARTITEQ Deco Rail 200 cm max. 20 kg/m (Pack of 5)
Original price was: £90.00.£72.00Current price is: £72.00.
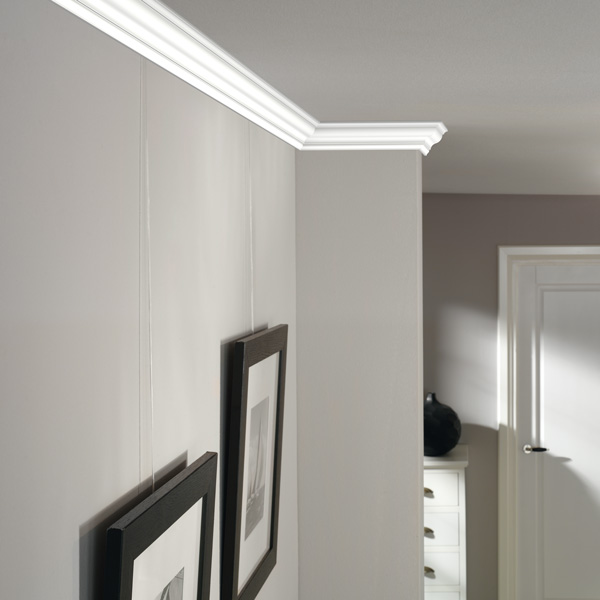
Great combination of picture hanging system with coving wall and ceiling. Cornices are fitted directly onto the Deco Rail.
PRODUCT INFORMATION
colour: white
length: 200cm
size: 35mm(H) 10mm(D)
capacity: 20kg per meter
ARTITEQ Deco Rail
ARTITEQ Deco Rail offers a great opportunity to incorporate a picture hanging system behind a cornice or ceiling coving. As the rail is installed behind a coving, it is hardly visible. Transform your space into a gallery of sophistication with the ARTITEQ Deco Rail, the ultimate solution for seamless picture hanging behind cornices and ceiling covings. Say goodbye to unsightly nails and cluttered walls, and hello to a refined, gallery-worthy display that enhances your decor.
What’s included
ARTITEQ Deco Rail 200cm max. 20kg/m (Qty 5)
Why the Deco Rail?
– Compatible with a wide array of Orac cornices including Basic, Modern, and Classic, it seamlessly integrates into any interior style
– Installed discreetly behind your cornice or coving, maintaining the integrity of your interior design
– The hanging wires discreetly connect to the rail, ensuring a clean, polished finish that enhances the aesthetic appeal of your space
– Flexibility in displaying your artwork designed to accommodate various styles of cornices
– Unlock the potential of your space and showcase your art collection like never before with the ARTITEQ Deco Rail
Stylish hanging system
The Deco Rail is the perfect solution for a wide range of interior spaces and properties. Whether you install it at the home, office, or gallery, it allows you to arrange your artwork the way you’ve always wanted. Like other ARTITEQ rails, this one can be used with Twister Hanging Wire and Twister Art Hanging Rod. The Deco Rail has a maximum weight capacity of 20kg per meter, which allows you to hang a wide variety of pictures and artwork. We offer a wide range of hooks that work great with this system such as Micro Grip Hook, Ratchet Hook and Heavy Brass Hook.
Advantages of Deco Rail
Hidden Installation: Mounts behind decorative ceiling coving/cornice before fitting.
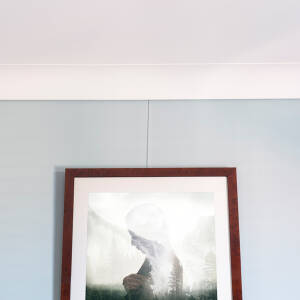
Invisible Wires: Perlon cords emerge directly behind the coving lip.
Weight Rating: Supports up to 20 kg per linear metre.
10-Year Warranty: Dutch engineered & TÜV certified.
Cornices
We recommend fitting this system with ORAC cornices; however, you are free to use any brand available on the market. In most cases, you can also order a sample if you are unsure which cornice to go for. Contemporary cornice mouldings offer multiple applications depending on your preference.
Q: What type of coving works with the Artiteq Deco Rail?
A: The Deco Rail is compatible with plaster, polyurethane, and lightweight XPS/polystyrene coving or cornice mouldings measuring at least 50mm in height.
Q: Do I install the Deco Rail before or after fitting the coving?
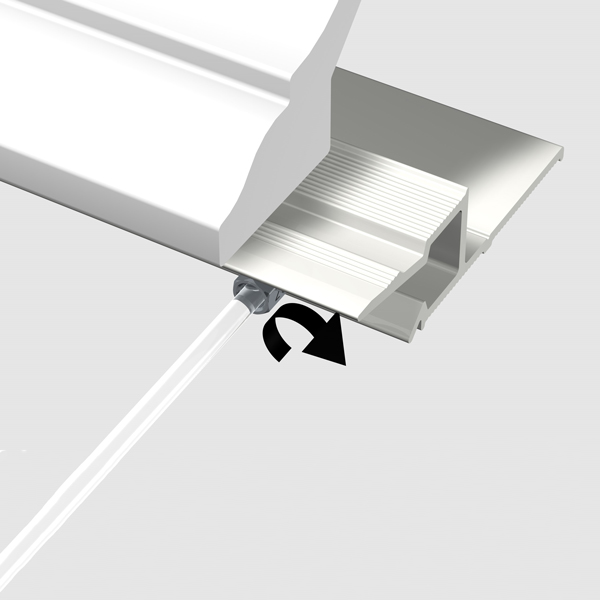
A: The Deco Rail must be installed first. The rail is fixed to the wall/ceiling corner, and the coving is then glued directly onto the front face of the rail.
Q: Can I replace the hanging cables later without removing the coving?
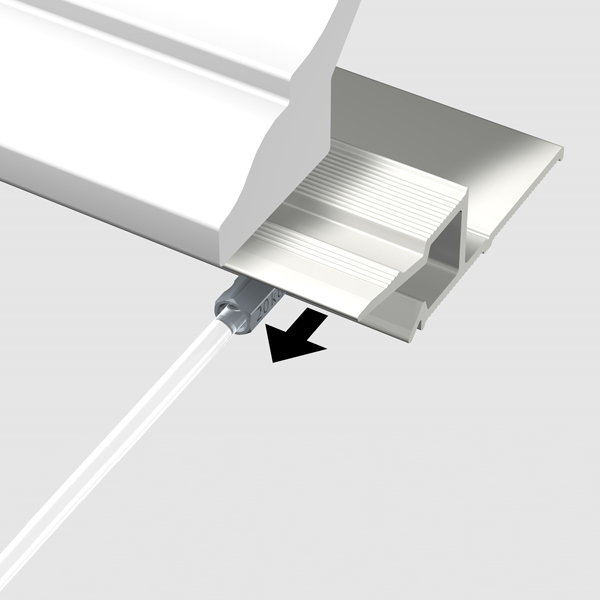
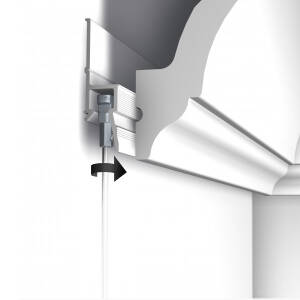
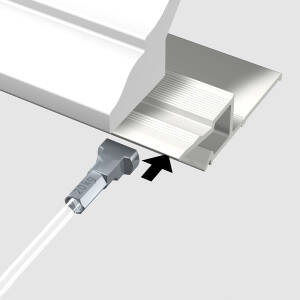
A: Yes. Artiteq Twister cables insert and twist into the rail slot from underneath the coving lip, allowing you to add, move, or remove cords at any time.
How to Install the Artiteq Deco Rail (Behind Coving / Cornice)
The Artiteq Deco Rail is designed to be installed during room renovation or redecoration before your ceiling coving (cornice moulding) is fitted. Once installed, the rail is 100% hidden behind the coving, allowing hanging cables to drop down invisibly.
Tools & Materials Required
Artiteq Deco Rail profile
Fastener Kit (screws, and rawl plugs)
Coving / Cornice Adhesive (e.g., Adefix, Decofix, or standard plaster cornice adhesive)
Drill with 6mm bit (masonry or plasterboard)
Screwdriver & Spirit Level / Laser Level
Fine-toothed Hacksaw & Mitre Box (if cutting rails to fit)
Step-by-Step Installation Instructions
Step 1: Prepare the Installation Line
Use a spirit level or cross-line laser level to mark a straight horizontal line along the top of the wall where it meets the ceiling junction.
Ensure the surface is clean, dry, and free of dust or loose plaster.
Step 2: Mark and Drill Wall Fixing Positions
Mark hole positions along your line.
Drill 6mm holes at the marked locations and insert the provided wall plugs (use hollow cavity anchors if mounting to plasterboard stud walls).
Step 3: Mount the Fixings
Fit rawl plugs in the holes, put the rail on the wall and drive the screws tightly into place.
Ensure all fixings align horizontally so the aluminium rail snaps on smoothly without twisting.
Step 4: Apply Adhesive and Fit Coving
Apply a continuous bead of high-tack coving adhesive directly onto the front face of the Deco Rail profile, as well as the top edge of your coving that contacts the ceiling.
Press your plaster, polyurethane, or polystyrene coving firmly against the Deco Rail and ceiling, ensuring the bottom lip of the coving sits slightly proud of the wall surface to leave a subtle gap underneath.
Clean off any excess squeeze-out adhesive along the edges.
Step 5: Paint and Insert Wires
Allow the coving adhesive to cure fully according to the adhesive manufacturer’s instructions.
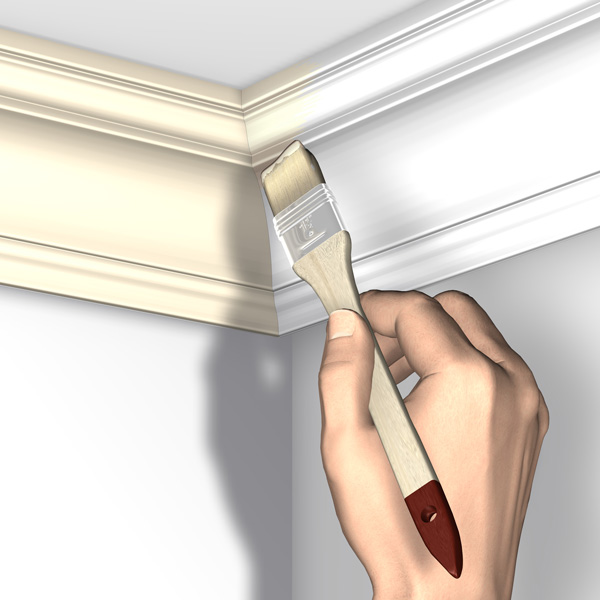
Paint the coving to match your ceiling or wall decor.
Insert Artiteq Twister Perlon or Steel Wires/Cables into the bottom slot behind the coving lip, twist 90° to lock into place, slide on your Ratchet Hooks or Micro Grip Hooks, and hang your artwork.


| brand | ARTITEQ |
|---|---|
| capacity | 20kg |
| rail colour | pure white (RAL9016) |
| rail length | 200cm |
Related products
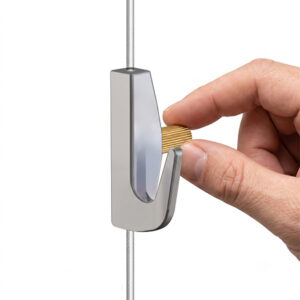
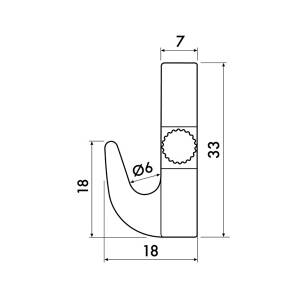
Excellent option for hanging light/medium pictures and artwork on a wall. Flexible use. Compatible with 2mm wires.
PRODUCT INFORMATION
capacity: 7kg 15lb
compatibility: 2mm wires
size: 33mm(H) 17mm(W)
type: screw-locking


Corners allow you to connect rails to form a frame. They are made of high-quality material, which makes them very durable.
PRODUCT INFORMATION
profile: 15mm
colour: grey
size: 73mm(H) 73mmm(W)
quantity: 4
Great combination of picture hanging system with coving wall and ceiling. Cornices are fitted directly onto the Deco Rail.
PRODUCT INFORMATION
colour: white
length: 200cm
size: 35mm(H) 10mm(D)
capacity: 20kg per meter

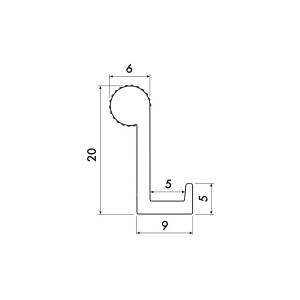
Perfect for hanging frames with square/rectangular brackets or sawtooth hangers. Very easy to use, fun to hang with.
PRODUCT INFORMATION
capacity: 10kg
compatibility: 2mm wires
size: 21mm(H) 23mm(W)
type: screw-locking

Perfect for hanging frames with square/rectangular brackets or sawtooth hangers. Very easy to use, fun to hang with.
PRODUCT INFORMATION
capacity: 10kg
compatibility: 2mm wire
size: 21mm(H) 23mm(W)
type: screw-locking
Corners allow you to connect rails to form a frame. They are made of high-quality material, which makes them very durable.
PRODUCT INFORMATION
profile: 8 mm
colour: grey
size: 73 mm(H) 73 mm(W)
pack: 4 corners