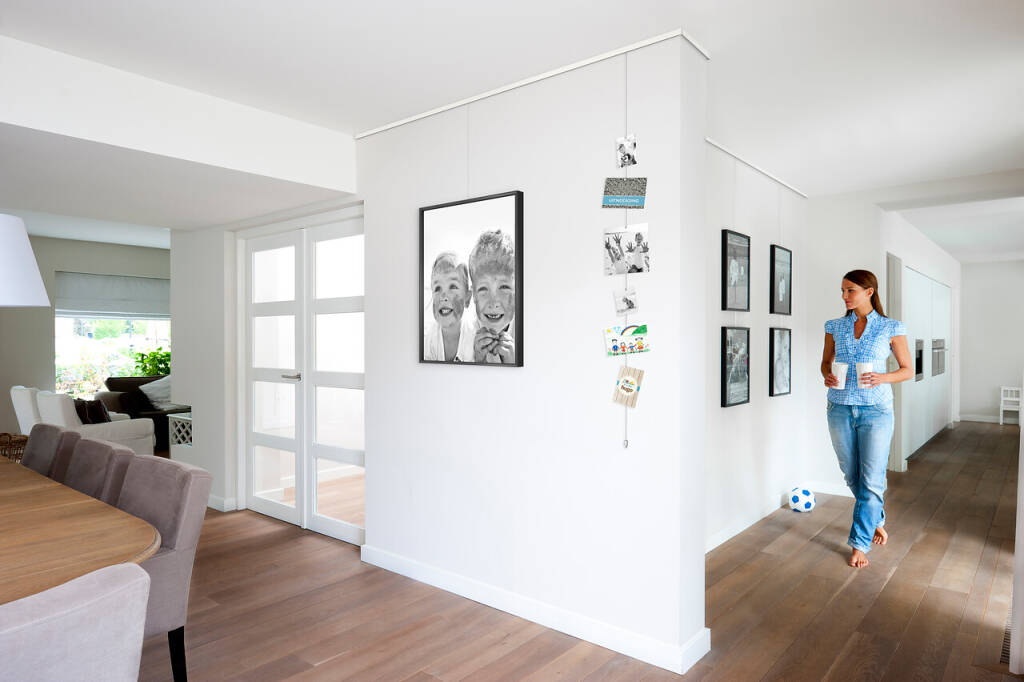

Expert Tips for a Seamless Whiteboard Installation

ARTITEQ Whiteboard Loop Hanging Set

Whiteboard Hanging Hacks

Looking to add a whiteboard to your office or classroom? A seamless installation is crucial to ensure that your whiteboard is securely mounted and ready for all your brainstorming sessions and presentations. But where do you start? Don’t worry, we’ve got you covered with our expert tips and hacks for hanging a whiteboard like a pro. Whether you’re a DIY enthusiast or a professional installer, our handy guide will provide you with all the information you need to achieve a seamless installation. From choosing the right location and measuring correctly, to selecting the right hanging hardware and ensuring a level mount, we’ll walk you through each step of the process. So, say goodbye to crooked whiteboards and hello to a perfectly positioned writing surface. Let’s dive in and discover the secrets to a flawless whiteboard installation.

Why use a whiteboard?

Whiteboards are versatile tools that offer numerous benefits in various settings. Whether you’re in a classroom, office, or even at home, a whiteboard can be a valuable asset. Unlike traditional chalkboards, whiteboards are easy to clean, leaving no residue or dust behind. This makes them ideal for interactive learning or collaborative brainstorming sessions. Additionally, whiteboards allow for easy erasing and rewriting, providing a dynamic and flexible platform for sharing ideas. With the ability to use different colors and markers, whiteboards offer a visually appealing way to present information. Furthermore, whiteboards can also serve as a focal point in a room, adding a touch of professionalism and organization. So, whether you’re a teacher, presenter, or simply someone who loves to jot down ideas, a whiteboard is a must-have tool.

Common challenges when hanging a whiteboard

While hanging a whiteboard may seem like a straightforward task, there are a few common challenges you may encounter. One of the main challenges is ensuring that the whiteboard is securely mounted to the wall. A poorly installed whiteboard can be a safety hazard, especially if it falls off the wall unexpectedly. Another challenge is achieving a level mount. A crooked whiteboard can be distracting and affect the overall appearance of the room. Additionally, if the whiteboard is not properly aligned, it may hinder the user’s ability to write or draw accurately. Finally, selecting the right hanging hardware can also be a challenge. With various options available, it’s important to choose hardware that is suitable for the weight of your whiteboard and the type of wall you are mounting it on.

Tools and materials needed for a successful installation

Before you begin hanging your whiteboard, it’s essential to gather the necessary tools and materials. Here’s a list of what you’ll need:

1. Whiteboard: Choose a whiteboard that suits your needs in terms of size and surface material. Consider factors such as the type of markers you’ll be using and the level of durability required.

2. Stud finder: This tool will help you locate the studs in your wall, which are essential for a secure installation.

3. Level: A level is crucial for ensuring that your whiteboard is mounted straight and level.

4. Measuring tape: Accurate measurements are essential for determining the placement of your whiteboard.

5. Pencil: A pencil will allow you to mark the desired mounting position on the wall before drilling.

6. Drill and drill bits: You’ll need a drill to create holes in the wall for the mounting hardware.

7. Wall anchors and screws: Depending on your wall type, you may need wall anchors and screws to securely attach the whiteboard to the wall.

8. Mounting brackets or clips: These hardware options will help you attach the whiteboard to the wall.

Now that you have all the necessary tools and materials, let’s move on to preparing the wall for hanging your whiteboard.

Preparing the wall for hanging a whiteboard

Before you start drilling holes in your wall, it’s important to prepare the area where you’ll be hanging your whiteboard. Here are the steps you should follow:

1. Choose the right location: Consider the purpose of the whiteboard and the needs of the users. Ensure that the whiteboard is easily accessible and visible to everyone in the room. Avoid placing it in areas with excessive sunlight or high humidity, as this can affect the durability of the whiteboard.

2. Locate the studs: Use a stud finder to locate the studs in the wall. Studs provide the most secure support for hanging heavy objects like whiteboards. Mark the stud locations with a pencil for reference.

3. Measure and mark: Use a measuring tape to determine the desired height and width of your whiteboard. Mark these measurements on the wall using a pencil. Double-check your measurements to ensure accuracy.

4. Determine the mounting position: Based on your measurements, determine the exact position where the top edge of your whiteboard will be. This will help you determine the position of the mounting brackets or clips.

5. Make pilot holes: Using a drill bit slightly smaller than the diameter of the screws, drill pilot holes at the marked locations. Make sure to drill into the studs for maximum support.

With the wall prepared, you’re now ready to hang your whiteboard. Follow the step-by-step guide below for a seamless installation.

Step-by-step guide to hanging a whiteboard

1. Attach the mounting brackets or clips: Depending on the type of hardware you’re using, attach the mounting brackets or clips to the back of your whiteboard. Make sure they are securely fastened and evenly spaced.

2. Lift the whiteboard: With the help of a friend or colleague, carefully lift the whiteboard and position it against the wall, aligning the top edge with the previously marked position.

3. Secure the whiteboard: Insert the screws through the mounting brackets or clips and into the pilot holes in the wall. Use a screwdriver or drill to tighten the screws, ensuring that the whiteboard is securely attached to the wall. If using wall anchors, follow the manufacturer’s instructions for installation.

4. Check for level and alignment: Use a level to ensure that the whiteboard is straight and level. Adjust as necessary by loosening the screws and repositioning the whiteboard.

5. Test the stability: Gently shake the whiteboard to ensure that it is securely mounted. If there is any movement, tighten the screws further or consider using additional hardware for added stability.

6. Clean and prepare the whiteboard: Before using the whiteboard, clean the surface with a whiteboard eraser or a damp cloth. This will remove any residue or markings from the manufacturing process.

Congratulations! You’ve successfully hung your whiteboard. But before you wrap up, here are a few additional tips to ensure a perfectly level and aligned whiteboard.

Tips for leveling and aligning the whiteboard

1. Use a laser level: A laser level can help you achieve precise alignment. Simply attach the laser level to the top edge of the whiteboard and adjust until the laser line is perfectly horizontal.

2. Check with a spirit level: In addition to the laser level, use a spirit level to double-check the alignment. Place the spirit level on top of the whiteboard and adjust as needed.

3. Measure the distance from the floor: To ensure consistency in the height of multiple whiteboards, measure the distance from the floor to the bottom edge of the whiteboard. This will help you achieve a uniform look if you have multiple whiteboards in the same room.

4. Consider magnetic strips: If you want to further enhance the stability of your whiteboard, consider using magnetic strips. Attach magnetic strips to the back of the whiteboard and the corresponding position on the wall. This will provide additional support and prevent any movement or sliding.

Alternative hanging methods for non-standard walls

While the previous steps covered the traditional method of hanging a whiteboard on a standard wall, there are alternative hanging methods available for non-standard walls. Here are a few options:

1. Command strips: Command strips offer a non-permanent hanging solution that is ideal for lightweight whiteboards. Simply attach the strips to the back of the whiteboard and press firmly against the wall. Command strips are easily removable without damaging the wall.

2. Floor-standing easels: If you’re unable to mount a whiteboard on the wall, consider using a floor-standing easel. These easels provide a portable and flexible solution, allowing you to move the whiteboard as needed.

3. Mobile whiteboard stands: Similar to floor-standing easels, mobile whiteboard stands offer the flexibility to move the whiteboard to different locations. These stands often come with wheels, making them easy to transport.

Maintenance and care tips for your whiteboard

To ensure the longevity and optimal performance of your whiteboard, it’s important to follow these maintenance and care tips:

1. Regularly clean the surface: Use a whiteboard eraser or a damp cloth to remove any markings or residue from the surface. Avoid using abrasive materials or harsh chemicals, as this can damage the whiteboard.

2. Use appropriate markers: Choose markers specifically designed for whiteboards. Avoid using permanent markers or other markers that are not intended for whiteboard use.

3. Store markers properly: When not in use, store the markers horizontally with the caps securely fastened. This will prevent the markers from drying out and ensure they are always ready for use.

4. Avoid excessive pressure: When writing or erasing on the whiteboard, apply moderate pressure. Excessive pressure can damage the surface and affect its erasability.

5. Protect the surface: Consider using a whiteboard film or protective cover to prevent scratches or stains on the surface. These protective measures can extend the life of your whiteboard.

Creative ideas for using whiteboards in different settings

Whiteboards are not limited to just classrooms and offices. Here are some creative ideas for using whiteboards in different settings:

1. Home organization: Use a whiteboard in the kitchen to write down grocery lists, meal plans, or family reminders. In the bedroom, a whiteboard can serve as a message board or a place to jot down daily goals.

2. Children’s playroom: Encourage creativity and learning by incorporating a whiteboard into a children’s playroom. Kids can use the whiteboard for drawing, practicing writing, or playing educational games.

3. Restaurants and cafes: Display menus or daily specials on a whiteboard for a dynamic and customisable approach. Customers can easily see the offerings and any changes or updates.

4. Fitness studios: Incorporate whiteboards into fitness studios for workout schedules, class descriptions, or tracking progress. Whiteboards can also serve as a space for members to leave motivational messages or share achievements.

Conclusion

Hanging a whiteboard may seem like a simple task, but with the right knowledge and techniques, you can achieve a seamless and professional installation. By following our expert tips and hacks, you’ll be able to confidently hang your whiteboard and enjoy a perfectly positioned writing surface. Remember to choose the right location, measure accurately, select the appropriate hardware, and ensure a level mount. Additionally, consider alternative hanging methods for non-standard walls and follow proper maintenance and care tips to prolong the life of your whiteboard. With these tips and ideas, you’ll be well-equipped to make the most of your whiteboard in any setting. So, go ahead and start brainstorming, collaborating, and sharing ideas on your newly installed whiteboard.

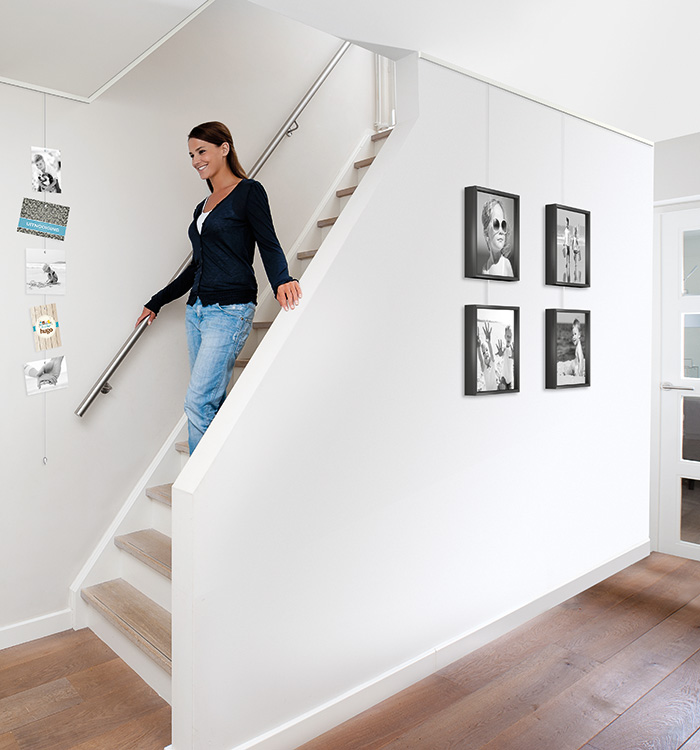
What Are The Advantages Of Installing A Hanging System

What Are The Advantages Of Installing A Hanging System


When it comes to art, it’s not only about the piece but how it’s displayed. When you have the ideal setup to hang your artwork, it makes them stand out much better. It helps you occupy space creatively and efficiently. Here are some advantages of using a hanging system.

Better for Adjusting Your Work

A gallery hanging system can help you get the most out of your space. Depending on the position, size, background, and décor of the place, you want to adjust accordingly. Maybe you’re hanging some work in an art exhibit and want to have a cohesive look for all of your artwork.

Curators pay attention to these small details and get a better vision of your art. It could be the difference in your pieces staying on display for another week or a buyer ready to make a purchase.

If you aren’t hanging things in a gallery or museum, you might want to put things in your living room. You have ample space on the wall and want to make sure that you utilize the room tastefully.

You have more flexibility to adjust the pictures in multiple ways before you decide on a final pattern to show off your work.

Keeps Your Work Secure

One of the main things if you’re dealing with expensive pieces, there are art thefts around that want to take your work. Curators will feel the weight off their shoulders when they can fasten the pieces more permanently.

Security hooks make it difficult to steal or tamper with the pictures. Not only will you have peace of mind that your work will be less prone to theft, but it’ll be harder to damage the work.

Also, the security hooks keep your pieces stable. As a result, you’ll see fewer accidents, such as items dropping to the ground from a high fall.

Quality Lighting

You want to show off the unique range of your work by adding a lighting system. You can get LED lighting systems to go with the art frames. Pick ones that work well with your pieces.

That way, you can get ample light but not ruin the integrity of the piece. Lighting that doesn’t produce heat will prevent your work from getting damaged. It’s imperative to have these in place for more delicate work, such as oil paintings and other sensitive art materials.

Saves Time

Another advantage of having a hanging system is saving time. You don’t have to use wires and nails only to find that everything isn’t unaligned. The hooks help secure everything in place, so you don’t have to spend hours to get the optimal setup.

Not to mention, you’ll have a professional look, whether it’s for selling pieces or just having some ambiance in your office. Whether you have a small or large painting, security hooks provide many benefits for hanging your artwork.

More Budget Friendly

It can be a hassle putting pieces by nailing them down. You never know how a wall may take to hammering and nailing. It can get expensive when it’s all said and done.

A gallery hooking mechanism saves you the trouble of hiring a professional to do the job because it won’t go through the wall in a way that affects its structure. Additionally, you won’t have to worry about redecorating and painting because of punctures in the wall.

Written by Randy Thom
Systematicart

How to Hang a Large Picture Safely (Step-by-Step)

How to Hang a Large Picture Safely (Step-by-Step)


In plain simple terms, a very heavy picture is one which you wouldn’t think twice about trying to hang without an extra pair of hands. The issue is not whether you can lift it. It’s about whether you have the strength and motor control in your upper body to execute a manoeuvre to hook it onto the wall on two sides while holding it above your head.

However, steel pins are not long enough nor are they strong enough to hold heavyweight pictures and should NOT be used unless you want your picture to fall off the wall. Ideally, you should aim to hang medium-sized pictures where the stud frame is (i.e. into the wood, which provides a more stable structure), but the chances are the location of the wall stud does not fit where you’d like to hang your picture. To check their location, you need to use a stud locator. The stud finder is invaluable for older properties and where you have drywall. If you know the drywall is robust, you can use a special anchor for drywall.If you live in an older house, you might find that some of your original interior walls are made of lath and plaster, and the rule for these is you absolutely MUST find the wall studs before you hang anything.

Domestic homes will always have exterior walls and load-bearing walls, which are suitable for hanging items that are heavyweight. Typically, the wall is a solid masonry (brick or stone) wall or a concrete block wall in the UK.These are the walls from which to hang a very large or very heavy picture (or mirror, i.e. there’s a good reason why huge mirrors are very often found on chimney breasts). That’s because this type of wall can take a longer screw length which might be required to get a solid fix. If you’re hanging artwork in another sort of space, you need to check what sort of wall it is. Banging on the wall often provides a good indication. If it sounds hollow, then it’s interior drywall. The other trick is to bang in a nail. If it’s easy to hammer in, then chances are it is drywall. If it takes a lot more effort, it’s probably a masonry wall. If it’s tough to impossible, then it’s very likely you’ve hit the concrete, and only drills and screws (and a heavy-duty electric drill) will work. The same can be said for good quality exterior brickwork.

Decorations

One further consideration is the decoration. If you think you might want to move paintings around a lot, we won’t favour walls which are wallpapered! It’s easy to fix holes in a painted plaster wall – but sorting out multiple large holes in the nice wallpaper is a bit of a challenge!

Heavy duty hanging designed to provide a more secure fixing to large and/or heavy pictures. They’re made of more robust metal and commonly have at least two if not three screw holes. It requires TWO bits of complementary hardware: a heavy-duty hanger. This is a flat steel plate with a hanging loop at one end, fixed to either side of the back of the picture frame. It’s often plated in brass and has at least two and often three holes to ensure a secure fixing should any screw get loose. They are often between 50mm and 90mm in length. They can have either a D-ring at one end or a straphanger with a square hanging loop.the heavy-duty J hook. This is fixed to the wall and is the mate for the heavy-duty hanger fixed to the frame. It provides a secure structure over which the D-ring or loop is hung. At the Picture World we offer a selection of ARTITEQ frame hangers.

Hanging is basically as good as the weakest point within the apparatus and the level of tension placed on any weaknesses. Hence, in general, it’s advisable not to use wire and d rings for cumbersome pictures because it’s been known for the wire to create a lot of strain that in turns pulls one screw D-ring out of the back of the frame, and the picture comes crashing down. Heavy-duty hanging hardware prevents pictures from falling off the wall so long as they are fixed to a robust wall, and the correct hangers for the weight are used. There’s no chain or wire involved, which might unravel or pull out from the back of the frame. You are also not reliant on one screw on either side of the tilted picture because they are fixed on either side and not in the middle; how to attach heavy-duty hangers to a heavy picture you need:

– bathroom scale for checking the picture’s weight and make sure that the fixings are suitable for the weight
– 2  heavy-duty hangers to fix to the back of the framer
– 2 heavy-duty wall hooks also called a heavy-duty J picture hanging hook one horizontal interlocking bracket system fixed to the top of the frame and the wall
–Screws for both the hanger and the hook suitable for the medium they are to be fixed to the type of screw is dictated by what you are fixing into (e.g. masonry or wood); the length of the screw is dictated by how thick the frame is (e.g. this is one of the reasons why larger/heavier pictures need bigger/thicker frames) how robust the wall is (e.g. in old brick we use longer masonry screws) wall plugs the size is dictated by the size of the hole in the heavy-duty hanging hook. The length of the screw size is dictated by the nature of the wall.
– the correct drill bit for the type of wall (e.g. you need a masonry drill bit for masonry walls)
– a spirit level – an ideally long one
– a measuring tape, sticky painters tape (the sort which lifts off easily), a soft pencil screwdriver hammer. Heavier pictures hung on two wall fixings.

WHAT’S THE Aim

The D-ring, the loop goes straight over TWO static and robust hooks on the wall, no picture wire or chain involved. Fix hanging straps to either side of the frame. Fix hanging hooks to the wall. Hang the strap over the frame. The process is as follows (omitting the checks as to which sort of drill bit, raw plug, screw you need to use) Weigh the picture located the studs in an interior wall if not using a sold wall. Check whether the width between the studs is compatible with the width between the vertical uprights of your frame. If not, review whether you want to relocate the place to hang.

Select a heavy-duty picture hanger that is the right gauge for the picture’s weight. Measure the depth of the frame and select the correct depth of screws (you don’t want the screws coming through the other side!)Mark off the same distance from the top of the frame. Make sure that you’ve taken account of the size of the hook it will be hanging over, which will fix the wall. You need to avoid this being on the show. Try placing the hook on the back of the frame, then place the hanging loop over it and determine where the plate needs to go on the back of the frame so that the hook is invisible. Drill a hole and screw the hanger in near the top on either side. Ensure that the plate is vertical and that the D-ring or loop is positioned at the top of the plate (ready to loop over the hook). Use the tape and spirit level to get the level right (i.e. bubble in the middle). Mark up the wall where the hook needs to go and then drill (and raw plug) the hole and screw the hook to the wall. Hang the loop or D rings over the hook on the wall.

Hanging Art Without Nails: Why We Recommend Artiteq

Hanging Art Without Nails: Why We Recommend Artiteq


Interior design is one of the most beautiful things you can do to make your your residential and commercial premises look great. Finding the best picture hanging system, however, can be tricky. that is why we make it is for you.

You can easily get ideal hanging products directly from ARTITEQ, which offer the best picture hanging experience. ARTITEQ products are made of high-quality materials and with attention to detail. Technology advances each day, and Artiteq seems to embrace it entirely.

You no longer need to hang your pictures, painting, and art using picture hanging nails. Besides, hitting nails on the wall to hold your photographs can damage the wall, but this is long gone. Instead of nails, we offer rail systems with suspension wires and picture hooks that will allow you to hang your pictures quickly and flexibly. ARTITEQ systems are manufactured from high-quality aluminium and designed to impress.

ARTITEQ prides itself on advancing concepts and hanging products which are helpful, groundbreaking, and long-lasting. It focuses on providing hanging solutions for commercial and residential uses; similarly, its primary goal is to offer the best experience to its customers by providing excellent and efficient picture hanging products.